Showing posts with label Desserts. Show all posts

Monday, April 20, 2020

Bubur Cha Cha


Bubur Cha Cha is a classic Malaysian dessert.  It is an assorted medley of sweet potatoes, yams, black-eye beans and sago cooked in sweet coconut milk. Bubur Cha Cha can be served warm or cold.

Ingredients:
100g black-eye beans, rinsed and soak in hot water for at least 1 hour
1/2 cups sago
1 medium sized each yellow, purple and orange sweet potato 
about 250g taro 
1.5 litre water
palm sugar (to suite your taste)
4 pandan leaves, washed and knotted together
1 can Ayam brand coconut cream (400ml)
pinch of salt
  • In a small pot filled with water, boil black-eye beans until soft. Set aside.
  • Place sago in strainer and rinse under running tap water.  Then boil sago in plenty of hot water until translucent and cook. Drain into strainer and rinse under cold water. Set aside.
  • Peel and cut sweet potatoes and yam into small cubes.  Steam separately until soft.
  • Meanwhile, fill a large pot with 1.5 litre of water.  Add in pandan leaves and palm sugar and bring to the boil. Simmer until palm sugar dissolves.  
  • Add in black-eye beans, steamed sweet potatoes, yam, sago, coconut cream and a pinch of salt.  Let it simmer for about 5 minutes.  Adjust the desired sweetness by adding more palm sugar (or white sugar).
  • Serve hot or cold.  

Wednesday, October 11, 2017

No-Bake Mini Strawberry Cheesecake


With fresh strawberries in abundance and relatively cheap I decided to make something out of these big, luscious, sweet strawberries.  After making the Lychee Cheesecake recently, of course Strawberry Cheesecake came to mind.  

This is a no-bake smooth, creamy and refreshing cheesecake where Greek yogurt is added to give a lighter texture and adds more flavour.  Top it with fresh strawberries before serving and it will suit any dinner party.


Crust: 
150g Marie biscuits, or any biscuits of your choice
85g butter, melted

Filling:
250g cream cheese, softened
150g caster sugar
350g strawberries, washed and hulled
6 gelatin sheets
40g lemonade (I used Sprite)
125g thickened cream (chilled)
125g Greek yogurt

  • Process biscuits finely in a food processor.  Add in melted butter and mix to combine.
  • Press biscuits into individual dessert mould and using a glass, firmly press down the crust to compact it.  Refrigerate while preparing the filling.
  • Beat chilled cream and yogurt together until soft peaks form.  Set aside in the fridge.
  • Place gelatin sheets into a bowl of cold water for about 10 minutes to soften them. Meanwhile gently heat up the lemonade. Squeeze out excess water from the gelatin sheets; then add into the warmed lemonade and stir gently until it dissolves.  Set aside.
  • Using a stick blender blend the strawberries to get 250g of strawberry puree.  Then push the puree through a fine sieve.  Add gelatin mixture into the strained puree and blend to combine.
  • Beat softened cream cheese and caster sugar until smooth and creamy.  Gradually add in the strawberry puree and beat to combine.   
  • Lastly fold in whipped cream and yogurt mixture.
  • Spoon the mixture into crusts and cover with plastic wrap.  Chill for at least 4 hours or overnight.  
Note:  If you are using gelatin powder, dissolve  15g gelatin powder in 40g strawberry puree or lemonade.

Monday, October 2, 2017

No-Bake Lychee Mini Cheesecake

cheesecake


Crust:
150g Marie biscuits
85g butter, melted

Filling:
250g cream cheese, softened
145g caster sugar
250g pureed lychee (blend 150g canned lychee + syrup)
1/2 tbsp lime juice
5-1/2 gelatin sheets
40g lychee syrup
250g thickened cream (chilled)
extra lychee, chopped coarsely
  • Process biscuits in a food processor.  Add in melted butter and mix to combine.
  • Press biscuits into individual dessert mould and using a glass, firmly press down the crust to compact it.  Refrigerate while preparing the filling.
  • Beat chilled cream until soft peaks form.  Set aside in the fridge.
  • Place gelatin sheets into a bowl of cold water for about 10 minutes to soften them. Meanwhile gently heat up the lychee syrup. Squeeze out excess water from the gelatin sheets; then add into the warmed lychee syrup and stir gently until it dissolves.  Set aside.
  • Blend the lychee and enough syrup to get 250g of lychee puree.  Add in lime juice and gelatin mixture and blend to combine.
  • Beat softened cream cheese with caster sugar until smooth and creamy.  Gradually add in lychee puree and beat to combine.   
  • Lastly fold in whipped cream and chopped lychee.
  • Spoon the mixture into crusts and cover with plastic wrap.  Chill for at least 4 hours or overnight.  
Note:  If you are using gelatin powder, dissolve  15g gelatin powder in 40g lychee syrup

Loose base pan

Monday, May 15, 2017

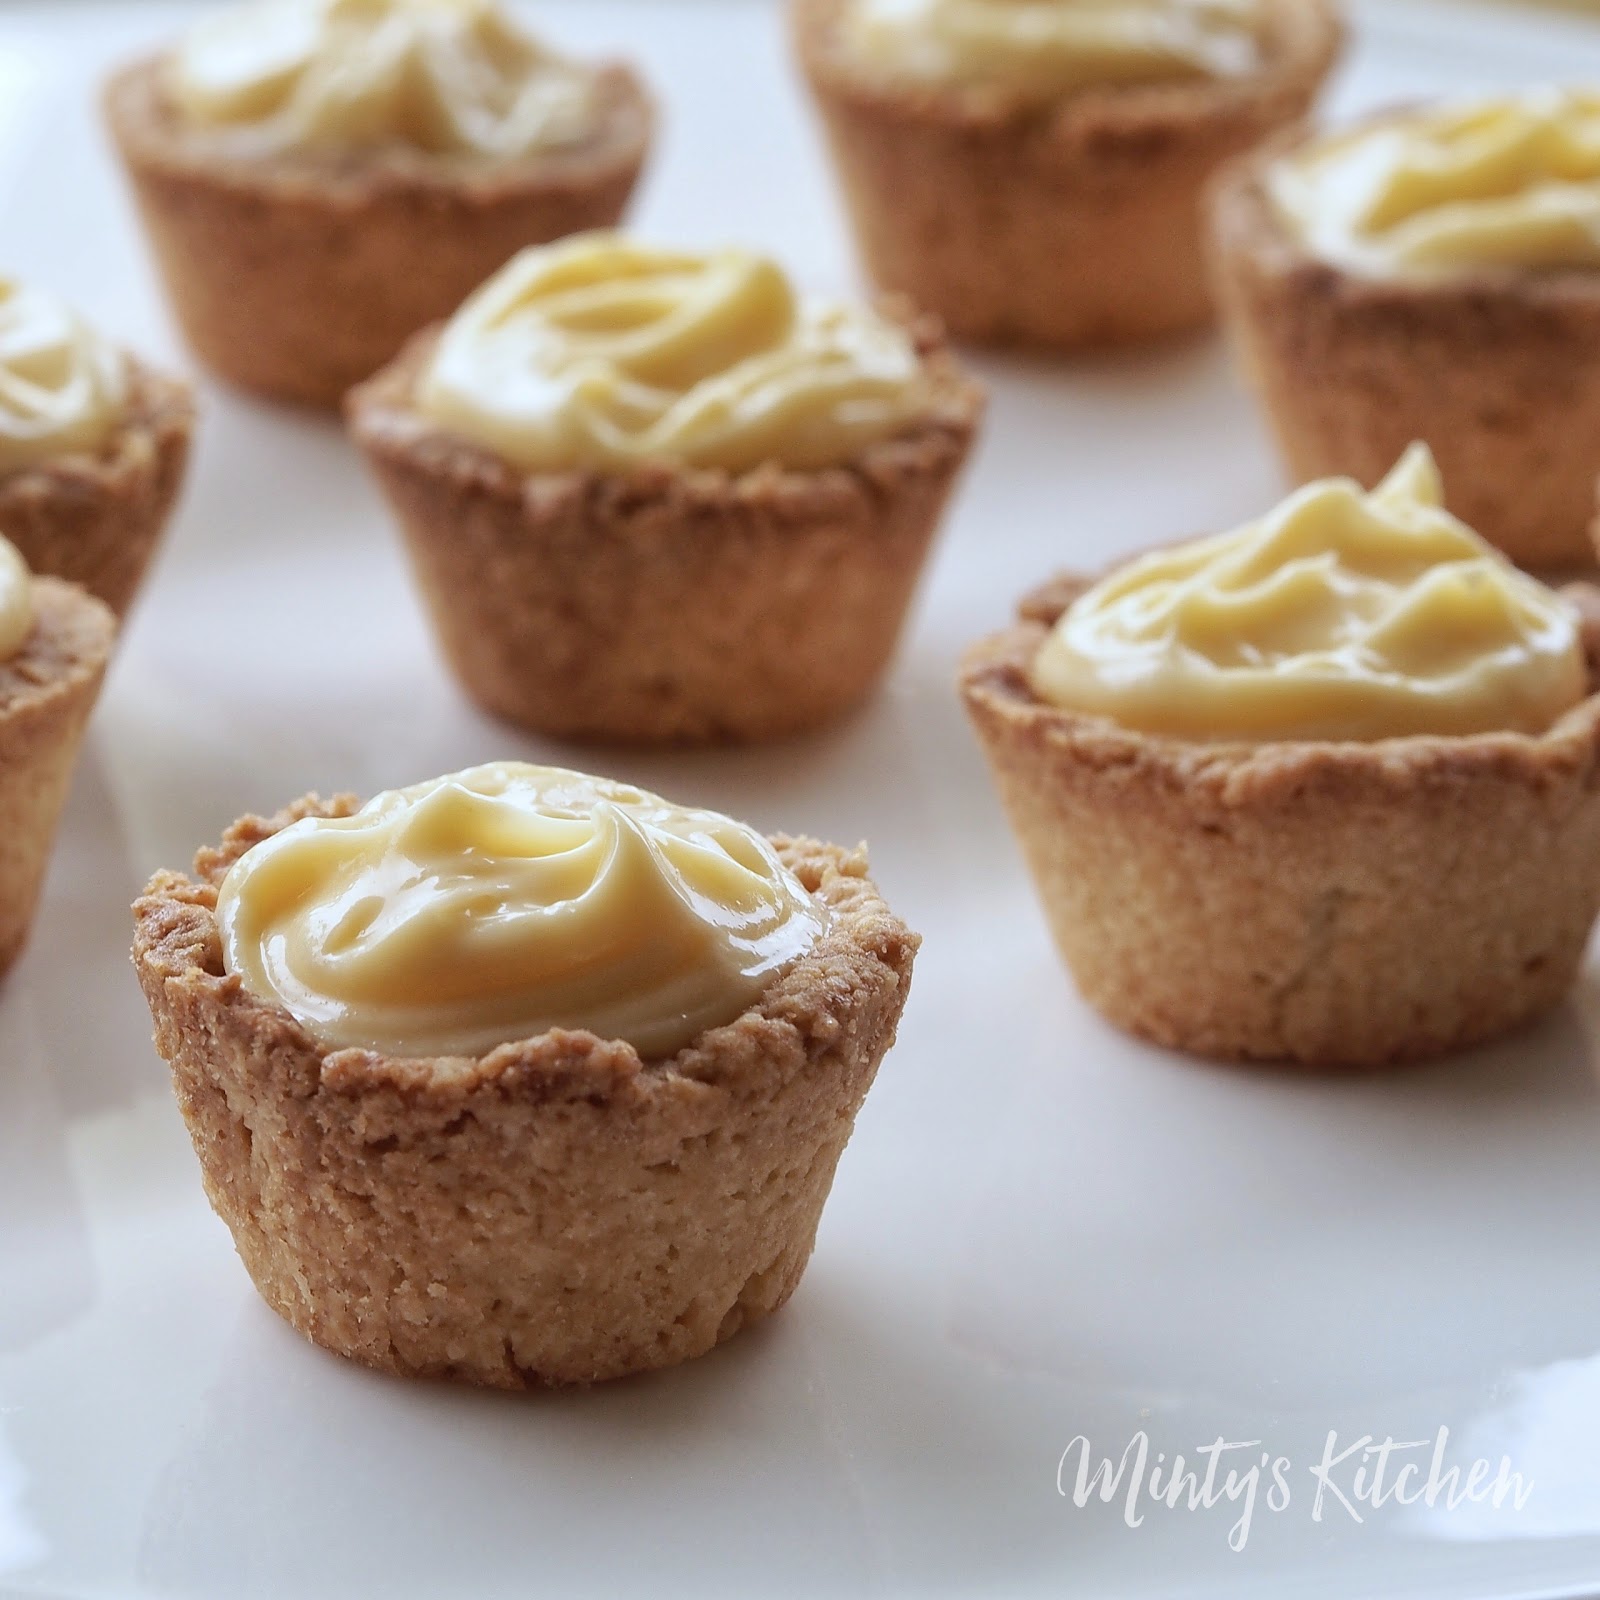
Meyer Lemon Tartlet


Adapted from Pierre Hermé  - Meyer Lemon Tart recipe

150g unsalted butter, cubed
60g caster sugar
30g almond meal
1/2 tsp vanilla extract
1 egg, room temperature
250g plain flour
1/2 tsp salt

  • Place flour, almond meal, sugar and butter into a large mixing bowl.  Rub the butter into the flour mixture with your fingertips until mixture resembles fine breadcrumbs.  Add in egg and mix until the dough binds together.  Knead the dough gently into a ball and wrap it in clingfilm. Refrigerate the dough for about 1 hour or overnight.
  • Remove dough from the fridge.  Take a small amount of dough and press down gently with your fingers so that the dough is centred in the well. Prick the bottom of the crust with a fork.  Rest in the fridge for 1 - 2 hours.
  • Bake tart shells in 180°C fan-forced oven for 10 minutes.  Remove from oven and place on a wire rack to cool. After tart shells are cooled slightly, remove them from the moulds and cool completely before use.

Lemon Cream

2 eggs (100g without shells)
120g caster sugar
70g fresh Meyer lemon juice 
zest of 2 lemons
120g unsalted butter, room temperature, cubed

  • In a large metal bowl, rub lemon zest with sugar until sugar is moistened and aromatic. Then add in eggs and lemon juice.
  • Bring a small saucepan holding a couple of inches of water to a simmer over very low heat. Place the metal bowl on top of the saucepan (ensuring that the bottom of the bowl does not touch the water) and whisk the mixture constantly until thickens and reaches 85°C (at this stage your whisk should leave a trail through the cream).
  • Strain the cream and let it cool to about 60°C.  Pour into a blender or use a stick blender to beat in the butter, a few cubes at a time until well blended.  Continue beating for another 2 - 3 minutes to achieve an airy and light cream.
  • Transfer cream into a container and press a piece of cling wrap on the surface of the cream.  Leave the cream to cool at least 4 hours or overnight in the fridge before using.  Just whisk the cream to loosen it before filling the tart shell.

Saturday, April 22, 2017

Baked Three-Cheese Tarts

Hokkaido Baked Cheese Tarts

Originating from Japan's island of Hokkaido, the most raved about Hokkaido Baked Cheese Tart is a crispy, and buttery shortcrust pastry base filled with a top-secret mix of three types of cheese produced in Hokkaido.  However what we are getting in Australia is a close replica, made with local quality dairy product. Today I decided to try my hands on making Meg's HBCT recipe.  And I was over the moon when my tarts came out from the oven - they were simply beautiful and bursting with cheesy aromas. Thank you Meg for sharing the recipe!


Tart Pastry:
100g plain flour
20g caster sugar
50g cold salted butter, cut into cubes
1 egg yolk
1/2 tsp fresh milk

  • Place flour, sugar and butter into a large mixing bowl.  Rub the butter into the flour with your fingertips until mixture resembles fine breadcrumbs.  Add in egg yolk and milk and mix until the dough binds together.  Knead the dough gently into a ball and wrap it in clingfilm. Refrigerate the dough for about 1 hour.
  • Remove dough from the fridge.  Take a small amount of dough and press down gently with your fingers so that the dough is centred in the well. Prick the bottom of the crust with a fork.  
  • Bake tart shells in 180°C fan-forced oven for 10 minutes.  Remove from oven and place on a wire rack to cool. After tart shells are cooled slightly, remove them from the moulds and cool completely before use.


Cheese Custard:
(A)
150g cream cheese
50g mascarpone cheese
20g parmesan cheese
30g salted butter
100g fresh milk

(B)
30g icing sugar
12g corn starch

(C)
1 whole egg
1/2 tbsp lemon juice
1/2 tsp vanilla extract
1/4 tsp sea salt

  • Bring a small saucepan holding a couple of inches of water to a simmer over very low heat. Place a heatproof bowl on top of the saucepan ensuring that the bottom of the bowl does not touch the water (you only want the steam from the simmering water to gently warm the bowl).
  • Place all ingredients (A) into the bowl and stir occasionally until all the cheese have melted.
  • Sift in all ingredients (B) and stir to combine.  
  • Add in all ingredients (C) and continue to stir until well blended.  The mixture will thicken.
  • Strain the cheese custard through a fine mesh strainer to get a velvety and smooth texture.  Leave the custard to cool completely before using.
cooking cheese custard over double-boiler
cooked cheese custard


To fill the tart shells:

Glaze - 1 egg yolk, beaten
  • Preheat oven to 230°C (fan-forced).
  • Fill the cheese custard into a piping bag with a nozzle and pipe custard into the cooled tart shells.  Brush the top of the custard with beaten egg yolk.
  • Bake the cheese tarts for 7 minutes.
  • Remove tarts from oven and place on a wire rack to cool.

Note:  I managed to make 8 mini tart shells but didn't use up all the cheese custard. 

Tuesday, June 28, 2016

No-churn Coffee Ice-Cream

... drizzled with salted caramel sauce

You don't need an ice-cream maker to make this delicious, creamy and smooth ice-cream, and it is so quick and easy.  Just 3 ingredients - cream, condensed milk and flavour of your choice! How simple is that?  

Recipe adapted from Eugenie Kitchen's No-Churn Ice-Cream

Ingredients:
480ml thickened cream
300ml condensed milk
2.5tbsp instant coffee
2 tbsp hot water
2 tsp vanilla extract

  • Melt instant coffee in hot water.  Add in vanilla extract and condensed milk.  Whisk until combined.
  • Whip thickened cream until soft peaks form.
  • Add 1/3 of whipped cream into coffee-condensed milk mixture and whisk until blended. Then pour the mixture into the whipped cream; fold until combined.
  • Pour into a container and freeze.


Sunday, December 1, 2013

Eggless Tiramisu


When we talked about Italian food, instantly we think about pasta, pizza, risotto, etc.  And at the mention of Italian dessert, Tiramisu comes to mind immediately.  Tiramisu which means "pick me up" is a popular dessert found on almost all the Italian restaurant menu.  

To celebrate the first day of summer in Melbourne, I am serving Tiramisu as dessert for lunch, yes lunch!  as we can't wait until dinner  ;-)    The authentic Tiramisu recipe usually calls for raw eggs but since I am not a fan of using raw eggs in my cooking or desserts, I decided to go with an eggless recipe.


Recipe loosely adapted from here

Ingredients:   [Pyrex rectangle dish (2.6L)  approx 17 x 22 cm]

250g mascarpone cheese (or cream cheese), softened
250ml fresh cream
110g caster sugar
1 cup strong coffee
50ml Kahlua
cocoa powder

  • Combine the coffee with Kahlua and leave it to chill in the refrigerator.
  • Whip fresh cream until stiff and chill in the refrigerator.
  • Whip cheese with sugar until cheese is smooth. Fold in the whipped cream.
  • Quickly, dip sponge fingers into the coffee mixture and arrange in a single layer in the glass dish.  Spread cheese mixture over.  Lay another layer of sponger fingers and top with cheese mixture. 
  • Cover and refrigerate overnight.
  • Before serving, sieve a layer of cocoa powder over the tiramisu or garnish with chocolate shavings.

Monday, November 4, 2013

Creme Caramel

Creme Caramel
Creme Caramel
Creme Caramel


I had my very first taste of Creme Caramel  in the early 1980's in one of the coffee shops in Ipoh old town and I fell in love with it.  I only knew it as Egg Custard then.   Anyway, Creme Caramel has become one of my favourite desserts; I loved its smooth, velvety and silky texture.  I would usually  baked it in a water bath but yesterday I decided to steam it in my wok instead.  This morning, much to my delight, when I turned  my creme caramel out, they tasted exactly the same as they would baked.  By steaming, it definitely saves time. 


Makes 6

For caramel:
3/4 cup caster sugar 
3 tbsp water
  • Combine sugar and water in a small heavy-based saucepan.  Stir over medium-high heat until sugar melted and become an amber-coloured caramel.   Remove saucepan from heat. Pour caramel into ramekins and immediately tilt the ramekin to spread the caramel evenly over the base.  Set aside.

For custard:
1/4 cup caster sugar
2 cups milk
1/2 cup fresh cream
2 whole eggs
3 egg yolks
pinch of salt
1/2 vanilla bean
  • Place the cream and milk in a saucepan.  Using a small sharp knife, split the vanilla bean lengthways, then scrape the seeds out and add the seeds and bean into the milk mixture.   Slowly bring the cream and milk just to a boil.
  • Meanwhile, whisk together the eggs, yolks and sugar.
  • While still whisking, drizzle in about a quarter of the hot milk mixture.  Gradually, while whisking,  pour in the remaining of the hot milk mixture.  
  • Strain the mixture through a fine sieve into a jug and fill the ramekins with custard.
  • Put the ramekins in a wok or steamer and steam them over medium-high heat for about 13 minutes or until custard sets.  (Remember to place a large plate or foil over the ramekins)
  • Remove from the wok and let custard cool to room temperature.  Cover ramekins with clingwrap and refrigerate custard for at least 4 hours or overnight.
  • Before serving, run a thin knife around the edge of each ramekin.  Turn out onto a plate and serve.

Saturday, October 12, 2013

Frozen Bananas + Berries Ice-cream

Spectablend

Spectablend

Ingredients:

2 frozen bananas, peeled and cut into chunks
a handful of frozen mixed berries


  • Place both ingredients into the Spectablend jug and secure the lid.
  • Gradually increase speed to High.  Using the tamper to press down the ingredients into the blade, blend until they reached the consistency of soft serve ice-cream. 
  • Do not over mix or they will melt.  Serve immediately.


Thursday, September 19, 2013

Pink Soy Milk Jelly Mooncakes

Today which is also the 15th day of the eighth month in the Chinese lunar calendar is Mid-Autumn Festival.  It is the second grandest festival after the Spring Festival (better known as Chinese New Year).

Here's wishing all a very Happy Mid-Autumn Festival  -  中秋节快乐!


Recipe adapted from Ann's Tau Huay Jelly Mooncakes sans the filling.


Ingredients:

625g unsweetened soy milk
50g raw sugar
2 tsp agar-agar powder
pink colouring

  • Mix all the ingredients in a saucepan, bring to the boil under medium heat while stirring occasionally to avoid milk from sticking to the pan.  Turn off the heat.
  • Pour soy milk into jelly moulds.
  • When cooled place the jelly in the refrigerator to set.

Saturday, December 1, 2012

Sago-Mango Pudding

A delightful dessert to welcome the first day of summer ~


(Makes 6 glasses of pudding)
Ingredients:

130g sago
300g mangoes, peeled and diced - puree
50g mangoes, peeled and cubed
150ml orange juice
450ml coconut milk
150ml evaporated milk
150g sugar
5 tsp gelatine + 2 tbsp cold water


  • Pour sago into boiling water.  Let it boil for about 5 - 7 minutes.  Turn off heat, cover the pan and set aside for 15 minutes.  Run cold water into the pan and stir.  Then drain in a sieve.
  • In a blender, puree diced mangoes with orange juice. 
  • Sprinkle gelatine over 2 tbsp of cold water and let it bloom.  Then dissolve the gelatine in the microwave oven for a few seconds.
  • Combine coconut milk and sugar in a saucepan.  Simmer gently until sugar dissolves. Add in gelatine mixture and stir to combine.  The pour in mango puree and evaporated milk.  Stir well.
  • Divide mango cubes into glasses and then fill up the glasses with pudding mixture. 
  • Place the glasses onto a tray.  Cover with cling wrap and refrigerate the pudding overnight to sets.
  • Serve cold and garnish with fresh fruits.


Tuesday, July 10, 2012

Tiramisu


Adapted from Anne Burrell's Tiramisu recipe on  Food Network

Ingredients:

15 sponge fingers
250 mascarpone cheese (or cream cheese)
300ml thickened cream
1 egg
120g caster sugar
1 cup espresso coffee + 2 tbsp caster sugar
1/4 cup marsala / kahlua / tia maria liqueur
cocoa powder

  • In a metal bowl, combine the egg and caster sugar.  Beat well to combine.  Place the bowl over a pot of simmering water (ensure that the bowl does not touch the water).  Beat the egg until thick and pale.
  • Remove bowl from the double boiler and continue beating until the bottom of the bowl feels cool.
  • Add in the mascarpone and beat until combined or smooth.  
  • In a separate bowl, whip thickened cream until stiff peaks form.  Gently fold into the mascarpone mixture. Refrigerate for 1 hour.
  • Combine espresso coffee and the liqueur.  Stir until sugar has dissolved.  Set aside to cool.
  • Dip the sponge fingers in the coffee and line the bottom of a baking dish.  Spread one third of the chilled mascarpone mixture over the sponge fingers.  
  • Repeat this process and finishing with a layer of mascarpone mixture.  
  • Cover with clingwrap and refrigerate for several hours or overnight. 
  • Before serving, dust  cocoa powder over the top.


Tuesday, June 12, 2012

Warm Date-Cranberry Pudding With Butterscotch Sauce


Ingredients:

130g pitted dates
40g dried cranberries
240ml orange juice
zest of 1 orange
50g butter
3/4 tsp bicarbonate of soda
pinch of salt
85g brown sugar
110g self-raising flour, sift
2 eggs
1 tbsp cocoa powder
50g dark chocolate, chopped

  • Grease a deep 14cm square baking tin.  Line base with baking paper.
  • Preheat oven to 180 degrees C.
  • Combine dates, cranberries and water in a saucepan.  Bring to the boil.  Remove from heat and add in bicarbonate of soda.  Let it stand for 5 minutes.  
  • Process the dates mixture in a food processor until smooth.   Set aside.
  • In a mixing bowl, cream butter and brown sugar until pale in colour.  Beat in eggs, one at a time.  Add in orange zest.
  • Fold in flour and cocoa powder.  Stir in dates mixture and chopped chocolate.
  • Pour batter into prepared tin.  
  • Bake for about 50 minutes or until cake is cooked.
  • Remove cake from the oven.  Prick holes all over the surface of the cake and drizzle some butterscotch sauce over the top.  Return cake to the oven.  Bake a further 5 minutes.
  • Serve warm with butterscotch sauce and vanilla ice cream.

Butterscotch Sauce

120g coconut sugar, shaved (or brown sugar)
50g butter
1/2 cup cream

  • Combine butter and sugar in a small saucepan.
  • Stir over low heat until sugar dissolved.  Let simmer for about 3 minutes.
  • Finally, stir in cream.


Thursday, April 12, 2012

Black Sesame Glutinous Rice Balls ( 黑芝麻湯圓 )


Ingredients:

270g glutinous rice flour
200ml water (approx.)
100g black sesame seeds
50g walnuts
70g raw sugar
3 tbsp melted butter

To make black sesame paste:

  • Lightly toast black sesame seeds and walnuts. Set aside to cool.
  • In a food processor, grind the toasted sesame seeds and walnuts until fine.  Transfer into a mixing bowl and combine with sugar and melted butter to form a paste.  
  • Divide the paste into 50 pieces and roll into balls.  Refrigerate.   
 To make dumpling (tang yuan) dough:
  • Sift glutinous rice flour into a mixing bowl.  Add water and knead into a dough.
  • Break a small piece of the dough and flatten into a round disc.  Cook it in boiling water and simmer until it floats to the surface.  Remove the dough and knead it back into the main dough when it is cool enough to handle.  This helps the tang yuan to be chewy and sticky.
  • Divide dough into 50 pieces and roll into balls.  Cover with a damp kitchen towel to prevent from drying out.
  • Fill each dough with sesame paste and seal properly.  Lightly roll into a ball using both palms.  Set aside on a tray.  *
To cook dumpling (tang yuan):
  • Boil a big pot of water.
  • Put dumplings into the boiling water.  Cook until they float to the surface. Cook for a further 1 minute.
  • Scoop up the dumplings and transfer into hot ginger syrup.
To prepare ginger syrup:
  •  Boil water with rock sugar and a couple of slices of ginger, some pandan leaves and 1 tsp osmanthus (optional).  Stir until sugar dissolves.
Note:   *  Tang yuan can be frozen and stored in a ziploc bag. 


Sunday, March 25, 2012

Apple-Rhubarb Crumble


Ingredients:   (Serves 5)                                               

4 stalks rhubarb, cut into about 4 cm length
3 Granny Smith apple, peeled, cored and sliced
1/2 cup brown sugar
4 tbsp orange juice

Crumble:   
120g plain four
1/2 cup brown sugar (firmly packed)
100g butter, cut into small pieces
1/2 cup walnuts, chopped
1/2 cup rolled oats
1/4 cup dessicated coconut
1 tsp mixed spice
 
  • Cook rhubarb with orange juice and brown sugar until softened.  This will take about 15 minutes.
  • Preheat oven to 170 deg C.
  • Lightly greased ramekins with melted butter.  
  • To make crumble:  Combine plain flour and brown sugar in a mixing bowl.  Using your fingertips, rub in the butter until mixture resembles breadcrumbs.  Add in the rest of the ingredients. Refrigerate until required.
  • Spoon rhubarb into ramekins and top with sliced apple.  
  • Sprinkle crumble mixture over the rhubarb and apple and bake for about 20 - 25 minutes or until the crumble is golden brown.  
  • Serve warm with cream or vanilla ice-cream.


Tuesday, July 5, 2011

Bubur Cha-Cha


Ingredients:

150g yam
150g purple sweet potato
150g orange sweet potato
40g sago
400ml coconut milk
1000ml water
sugar to taste
salt to taste
pandan leaves

  • Peel and cut sweet potatoes and yam into cubes.  Steam separately until soft (about 5 - 7 minutes). 
  • Wash sago and rinse under cold water.  Cook until translucent and rinse under cold water again.  
  • Fill a saucepan with water and coconut milk.  Bring to the boil.  Add in pandan leaves and all the other ingredients.  Simmer for about 10 - 15 minutes.  Add sugar and salt.
  • Serve hot or cold as desire.

Sunday, February 13, 2011

Mini Pavlova


My first attempt at  making pavlova from Donna Hay's recipe.....

Ingredients:

4 egg whites
220g caster sugar (I reduced to 170g)
2 tbsp cornflour
2 tsp white vinegar

  •  Preheat oven at 150 degrees C.
  • Whisk egg whites until stiff peaks form, then gradually add sugar, whisking until thick and glossy.  
  • Add cornflour and vinegar and whisk until just combined.
  • Shape into 6 individual round shapes onto an oven tray lined with baking paper. 
  • Place in the oven, reduce temperature to 120 degrees C.  Bake for about 30 minutes.  Cool pavlova completely in the oven with door ajar (about 1 hour).
  • Whisk cream to soft peaks and spread over pavlova and top with your favourite fruit.


Wednesday, October 6, 2010

Tau Fu Fah (Soy Bean Custard)

 Thanks to my friend LiuChing, who taught me how to make this silky tau fu fah ...


Ingredients:

1 litre soy milk
1 1/2 tbsp cornflour
1/3 tsp GDL (Glucono delta-lactone)
50 ml cold water


  • Mix cornflour and GDL with cold water; pour into a pot.
  • Immediately pour the boiling soy milk vigorously into the pot with the cornflour mixture (this is to ensure that the setting solution is thoroughly combined with the soy milk).
  • Do not move or shake the pot until the custard is fully set.  This will take about 20 - 30 minutes. 
  • Serve custard with sugar syrup.
Related Posts Plugin for WordPress, Blogger...